![BATTLEGROUND-LOGO-WITH-TAG415x100px.png]](https://pages.battleground.com.au/hs-fs/hubfs/BATTLEGROUND-LOGO-WITH-TAG415x100px.png?width=332&height=80&name=BATTLEGROUND-LOGO-WITH-TAG415x100px.png)
|
Role |
Responsibility |
|
Simulation Manager |
Builds and configures the SIM. Manages status transitions, inject sequencing, and clock. Resets the SIM after use. |
|
Facilitator |
Guides participants through the exercise. Plays injects in real time. Manages participant engagement and debrief. |
|
Participant |
Receives injects via the participant play screen. They receive a link to access the simulation. Responds to injects and communicates with teammates within the SIM. |
|
Observer (optional) |
Views the simulation without active participation. Assigned by the Simulation Manager as required. |
Pre-Simulation Preparation
Create or open a simulation
Start in the Simulation / Workshop area, where you can:
- create a new simulation
- open an existing simulation
- clone an existing simulation as a starting point
When creating or editing a simulation, complete the core scenario fields carefully. The quality of this setup matters because it shapes how the exercise is built and how relevant the outputs will be.
Key fields include:
- scenario title
- country
- plan being tested
- objective
- response team
Why these details matter
Country
Country helps Radar generate content that matches the operating context. In the walkthrough, Craig explained that country is used so the AI can generate outputs, including images, that look and feel appropriate for that location.
Plan being tested
Selecting the plan helps anchor the simulation in the correct operational or response context.
Objective
The objective strongly influences what Radar builds. A more specific objective gives the AI better direction and leads to more useful injects.
For example, if the objective focuses on internal response, Radar may stay mostly internal in the injects it generates. In the walkthrough, Craig noted that Radar appeared to avoid newspaper-style outputs because the stated objective did not indicate a need to test external communications.
Response team
If you select a response team, the system can place those people and roles directly into the simulation.
Notifications
Decide whether to enable email participants so they are notified when injects are triggered. This alerts them to return to the system without exposing inject content.
Building the Exercise
All simulation configuration should be completed while the SIM is in Building status. Do not change the SIM status to In Progress until all preparation is finalised.
|
# |
Step |
Action / Detail |
|
1 |
Open the SIM / Making a new Simulation |
Log in to Battleground Live. Navigate to the Simulations module and open the relevant SIM. If it is a new simulation click on Fill in the detail including Simulation date and time. (Note: You can make up the time, or put in the actual time). Click save and build |
|
2 |
Verify status is Building |
Confirm the SIM is in Building status before making any changes. This screen is for development and configuration only. |
|
3 |
Adding Participants |
First you must click on Next you must press on You can also add in Facilitators and Observers. |
|
4 |
Add and Review all injects |
You can add an inject by clicking on the green plus in the inject timeline.
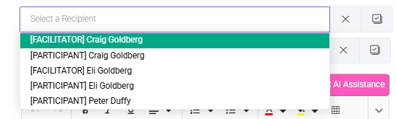
Make sure to put in who it will be sent to Tick whether you want it to be auto played Check every inject for accuracy of content, timing, sequencing, type (email, SMS, alert, memo, social, news, call), and intended recipient roles. |
|
5 |
Confirm inject routing |
Ensure each inject is assigned to the correct role. Injects sent to the wrong role will not appear in the intended participant's inbox. |
 and put in all the different roles you want to use.
  and add in each of the different participants for the workshop, and assign them to a role.
 as well as
 at the set time or manual play.
 Building the exercise with RAiDAR
The RAiDAR Inject Builder lets you generate exercise injects from an exercise brief instead of creating each inject manually. It is designed to speed up exercise design by using the scenario details, objectives, and any extra guidance you provide to build a draft set of injects for review.
What it does
RAiDAR can build a set of injects in the background, typically in around 5–10 minutes for a fuller exercise build.
It can generate:
- a sequence of injects across the exercise timeline
- different inject types
- AI-generated images
- voice-enabled content for some injects, such as news broadcasts
What information it uses
The quality of the output depends heavily on the context provided in the exercise setup. In the walkthrough, Craig noted that once more detail was added, RAiDAR had enough context to build effectively.
Important inputs include:
- scenario description
- country
- plan being tested
- exercise objectives
- response context
- optional supporting files
- Guide for Radar instructions
Why those fields matter
Country helps RAiDAR generate outputs that match the operating context, including visual style and scenario realism.
Objectives are especially important because they influence what kinds of injects RAiDAR creates. If the objective is framed around internal response, the generated injects may stay mostly internal. If the objective includes external communications or reputation impact, RAiDAR can be guided toward more public-facing injects such as media or social content.
Guide for Radar gives you a free-text way to steer the build further. For example, it can be used to focus the exercise on things like:
- reputation management
- brand stability
- communications pressure
How to use it
To use the RAiDAR Inject Builder:
- Open the simulation.
- Add a facilitator if required.
- Select Build Exercise with Radar.
- Complete the exercise brief.
- Choose whether to:
- let RAiDAR choose the number of injects
- select the exercise shape
- generate images
- Optionally upload supporting documents.
- Add any extra direction in Guide for Radar.
- Start the build.
Exercise shape options
The walkthrough showed these pacing options:
- steady drip
- front-loaded chaos
- escalating crisis
These settings help shape how the injects are distributed and how the scenario unfolds over time.
Inject types it can work with
The builder can generate injects using different presentation styles, including:
- Alert
- System Notification
- Memo
- News Broadcast
- Newspaper
- SMS
- Social Media
Craig described these as different “buckets” for how information is delivered inside the exercise.
Review the output
After RAiDAR generates the injects, review them before running the simulation. You can:
- adjust timing
- add or remove injects
- change inject types
- refine the sequence manually
The generated exercise is intended to be a strong draft, not a locked final product.
Best practice
To get better results:
- provide a clear scenario
- be specific in the objectives
- set the right country / context
- upload supporting material where useful
- use Guide for RAiDAR to direct the exercise toward the risk or leadership issue you want to test
Launching the Simulation
Click on invite all participants  before making the exercise live
Changing the SIM status to In Progress and press on the Play button  to make it live.
  Participants can click on the email link and see their play screens. Only make this transition when all injects and participants have been configured and verified.
|
# |
Step |
Action / Detail |
|
1 |
Final pre-launch check |
Confirm all injects are correct, all participants are added with the right roles, and facilitators are confirmed. |
|
2 |
Invite all, and change status to In Progress |
Invite all participants. Move the SIM status from Building to In Progress. Press on the play button. The SIM will synchronise with the web platform and become accessible to participants. |
|
3 |
Send invitations |
Invitations are sent to participants via email. Each participant receives a unique personal link to access their play screen. Facilitators will also receive access. |
|
4 |
Confirm participant access |
Verify that participants can access their play screen via the link. The participant screen will display all their inject inboxes and adjust the clock to their local time zone. |
Inject Types Reference
The following inject types are available within the Battleground Live Simulations module:
|
Inject Type |
Description |
|
Alert |
General alert notification delivered to the participant dashboard. |
|
Call |
Simulated phone call inject. |
|
|
Inbox email. Participants can reply. Responses are logged in the timeline. |
|
Memo |
Internal memo delivered to participant dashboard. |
|
News Broadcast |
Simulated news media broadcast. |
|
Newspaper |
Printed media inject. |
|
SMS |
Text message. Participants can reply. |
|
Social |
Social media posts. Simulates Facebook, Slack, Twitter, or Yammer feeds. |
Role and Participant Management
Roles define which injects each participant receives. Participants must be assigned to roles before the SIM goes live.
|
# |
Step |
Action / Detail |
|
1 |
Review available roles |
Navigate to the Manage Participant Roles. Review all roles configured within the SIM (e.g., CMT Leader, Operations Manager, Communications Lead). |
|
2 |
Add participants |
Add each participant by name and assign them to the appropriate role. A participant can hold one or more roles depending on exercise design. |
|
3 |
Add facilitators |
Assign facilitator access to Battleground staff or client-side facilitators as required. Facilitators are visible to participants during the exercise. |
|
4 |
Verify participant list |
Confirm all intended participants appear in the participant list with correct role assignments before proceeding. |
Participant Play Screen
On clicking on the link they received participants will see one of the following states depending on timing:
|
Screen State |
What the Participant Sees |
|
Waiting Room |
"The workshop is ready to start. This screen will automatically display your workshop dashboard when the facilitator begins." |
|
Pre-Workshop Questionnaire |
If configured: a questionnaire form. Participant enters details and submits before the exercise begins. |
|
Workshop Dashboard (Live) |
All inject inboxes are displayed. Notifications arrive visually and via audio when a new inject is delivered. |
|
Post-Workshop Questionnaire |
If configured: a post-exercise questionnaire for participant reflection and data capture. |
|
Closed / Presentation |
The facilitator has ended the SIM. Results can be presented in this phase. |
Running the Simulation
Starting the Clock
The simulation clock must be started by the Simulation Manager when all participants are ready. Injects cannot be played until the clock is running.
|
# |
Step |
Action / Detail |
|
1 |
Start the clock |
Click the play button. Injects will become available to play. The clock represents simulation time, not real time. |
|
2 |
Confirm inject availability |
Once the clock starts, injects will show as playable. Verify that the first inject is correctly queued. |
Playing Injects
The Simulation Manager or Facilitator controls inject delivery. Injects do not play automatically by default unless Auto Play is enabled.
|
# |
Step |
Action / Detail |
|
1 |
Manual play
|
Click the Play button Participants will hear an audio notification and see the inject appear in their inbox. |
|
2 |
Auto Play
|
To set an inject to play automatically, click the M |
|
3 |
Monitor responses |
Participant replies and actions appear in the timeline. The Facilitator can view all participant activity from the facilitator dashboard. |
|
4 |
Time jump |
Double-click on the inject to advance simulation time. Use this to skip ahead during slow periods or to test later injects. |

 on each inject to deliver it to the relevant participant(s).
 . Auto Play injects fire based on simulation time without manual triggering.
Participant Actions During the Exercise
Participants can take the following actions from their play screen:
- View injects: Click on any inject inbox to read its contents. Injects change colour when a new notification is received.
- Reply to injects: Email and SMS injects allow participants to reply. Reply options appear in the top right corner of the inject.
- Create new messages: Participants can initiate new emails at any point using the orange New Message button in the top right corner of the dashboard.
- View the team: Participant names and assigned roles are visible within the platform to support realistic communication.
|
NOTE: All participant replies are logged in the timeline and are visible to the Facilitator. Replies to facilitators are routed to the relevant facilitator inbox. |
Ending the Simulation
|
# |
Step |
Action / Detail |
|
1 |
End the SIM |
Click the End Simulation control. This closes the participant play screens and moves the exercise to the Closed state. |
|
2 |
Present results (optional) |
If applicable, the Facilitator can present the simulation timeline, inject log, and participant responses as part of the debrief. |
|
3 |
Administer post-workshop questionnaire |
If a post-workshop questionnaire has been configured, participants will be prompted to complete it at this stage. |
|
4 |
Conduct debrief |
Lead a structured debrief discussion covering response quality, decision points, communication gaps, and lessons identified. |
RAiDAR Debrief
The RAiDAR Debrief button generates a draft debrief report after a simulation. It is designed to save time by turning exercise activity into a structured first-pass report.
What it uses
RAiDAR Debrief reads the information captured during the exercise, including:
- participant activity logs
- facilitator notes
- participant notes
- in-exercise chat
This means the quality of the debrief depends on what was captured during the exercise. If notes, chat, and participant activity are actively used, the debrief has more context to work from.
What it produces
RAiDAR Debrief creates a report draft that can be reviewed and refined after generation. In the walkthrough, Craig described it as producing an HTML output that can then be downloaded for Word, branded, and edited further.
You can use it to generate:
- a first-pass exercise summary
- structured debrief content
- draft sections for post-exercise reporting
How to use it
After a simulation:
- Open the exercise.
- Select RAiDAR Debrief.
- Choose or define the sections you want included.
- Generate the report.
- Review and refine the output.
Why it matters
The feature is intended to reduce the manual effort involved in turning exercise activity into a usable debrief. Rather than writing from scratch, users start from an AI-generated draft based on what happened in the simulation.
Important usage note
RAiDAR Debrief is most useful as a starting point, not a final polished report. In the walkthrough, Craig noted that this area was functional but still early, and that more work was planned on it.
Best practice
For stronger debrief output:
- make sure participant activity is captured in the platform
- use chat inside the exercise where possible
- capture facilitator and participant notes during the run
- review the generated report before sharing it externally
If you want, I can rewrite this into a clean help-site paragraph style with no citations and more polished wording.
Post-Exercise Reset
|
# |
Step |
Action / Detail |
|
1 |
Return to Building status |
Navigate back to the SIM and change the status to Building. This disables participant access and returns the SIM to configuration mode. |
|
2 |
Allow synchronisation |
Wait for the SIM to synchronise with the platform before making changes. |
|
3 |
Reset injects |
Click Reset Injects to restore all injects to their pre-played state. This clears all delivery history and participant response data. |
|
4 |
Delete test content |
Review the inject list and delete any test messages or responses sent during the exercise that should not persist in the SIM. |
|
5 |
Verify clean state |
Confirm that all injects are in an unplayed state and the SIM is ready for its next use. |
|
CAUTION: Resetting injects clears all delivery history and participant replies for this SIM. If exercise data is required for reporting or lessons-learned review, export or document it before resetting. |
Common Issues and Resolution
|
Issue |
Resolution |
|
Participant cannot access the play screen |
Confirm the SIM is in In Progress status. Resend the invitation email. Verify the participant is in the participant list with a valid role assigned. |
|
Inject not appearing in participant inbox |
Check that the inject is assigned to the participant's role. Confirm the clock is running. Verify the inject has been manually played (if Auto Play is not enabled). |
|
Participant replies not visible |
Check the facilitator timeline view. Replies appear there in real time. Refresh the facilitator dashboard if needed. |
|
Clock not starting |
Confirm the SIM status is In Progress. Only the Simulation Manager role can start the clock. |
|
Auto Play inject fired too early |
Disable Auto Play on that inject (click to turn it back to manual). Re-sequence inject timing in Building mode before the next exercise. |
|
SIM not synchronising after status change |
Wait 30 to 60 seconds and refresh. If the issue persists, return to Building status and change back to In Progress. |
|
Participant sees a blank dashboard |
The facilitator has not yet started the clock. The participant is in the Waiting Room state. Start the clock to activate the dashboard. |
Facilitation Best Practice
The following guidelines support consistent, high-quality simulation delivery:
- Conduct a dry run of the SIM in Building mode before the live exercise, particularly for new scenarios or client-facing sessions.
- Test the invitation process with a colleague before the day to confirm links are working and the participant screen loads correctly.
- Brief participants on the play screen and inject types at the start of the session. Use the Battleground Simulations Participant Quick Guide as a pre-read.
- Keep a printed or digital checklist of injects and participant roles to support real-time facilitation.
- Monitor the facilitator timeline continuously during the exercise. Participant replies appear there and may require facilitator follow-up injects.
- Use the Time Jump function deliberately. Overuse can disorient participants and compress response time unrealistically.
- Do not reset the SIM until any required exercise data, observations, or screenshots have been captured.
- For demonstration SIMs, always reset to a clean state immediately after use so the scenario is ready for the next prospect or client session.